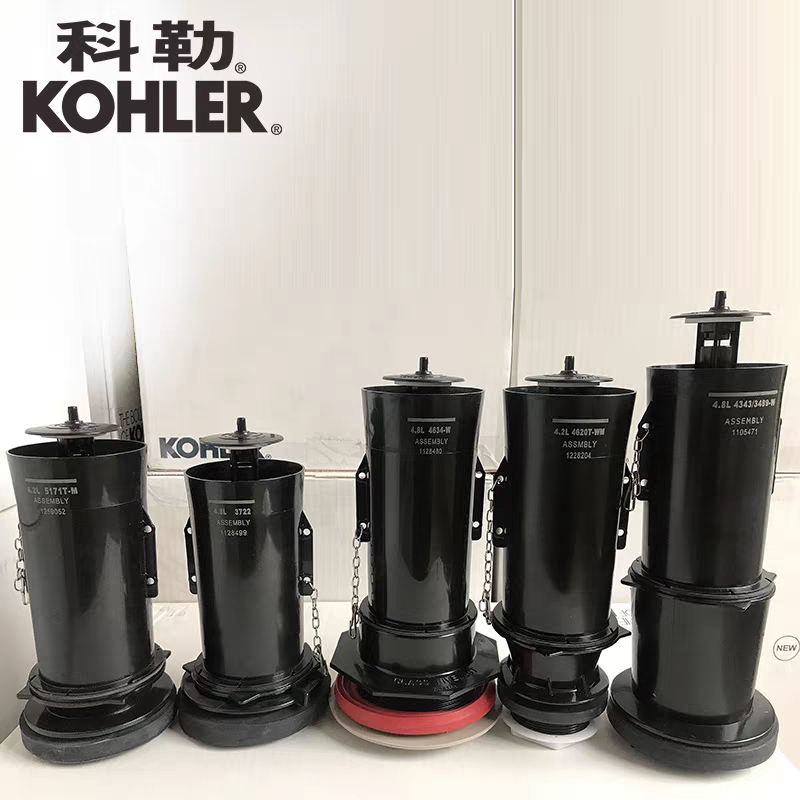
Los inodoros Kohler son conocidos por su diseño y rendimiento confiable, pero como todos los componentes de plomería, algunas piezas se desgastan con el tiempo. Uno de los problemas más comunes es una válvula de descarga defectuosa. Ya sea que tenga una fuga, una descarga débil o un inodoro que gotea constantemente, reemplazar la válvula de descarga puede restaurar su correcto funcionamiento. Esta guía le explicará cómo reemplazar una válvula de descarga en un inodoro Kohler, ya sea la válvula completa o solo el cartucho interior, con consejos para elegir las piezas adecuadas según su modelo y los tipos de sistemas de descarga.
1. Introducción
La válvula de descarga controla cómo sale el agua del tanque y entra en la taza. Con el tiempo, la válvula puede desgastarse, lo que provoca un desperdicio de agua o una descarga ineficiente. Esta publicación se centra en las válvulas de descarga de inodoros Kohler, en particular los modelos de dos piezas, y le ayudará a evaluar el problema, seleccionar la pieza correcta e instalarla paso a paso.
2. Preparación antes del reemplazo
A. Diagnosticar el problema
Antes de comprar una pieza nueva, determine si toda la válvula de descarga está dañada o si solo necesita reemplazarse el depósito (también llamado flotador o torre). Si la estructura del tanque está bien y solo el cubo central está desgastado o agrietado, puede ahorrar tiempo y dinero comprando un kit de reparación de válvulas de descarga.
B. Identificar el modelo correcto
Kohler ofrece una amplia gama de válvulas, incluidas las válvula de descarga de inodoro de 3 pulgadas Se utiliza en muchos de sus modelos modernos. Cada dimensión de válvula de descarga suele corresponder a un modelo de inodoro específico. Usar un tamaño o tipo incorrecto puede provocar fugas o incompatibilidad. Siempre verifique el número de modelo estampado en el interior del tanque o consulte el manual de su inodoro para verificar la compatibilidad exacta. Esto es especialmente importante para el reemplazo de la válvula de descarga de inodoro Kohler de dos piezas.
C. Herramientas que necesitarás
Llave ajustable, destornillador, toalla o esponja, válvula de descarga o recipiente de repuesto, guantes de goma (opcional)
D. La seguridad es lo primero
3. Guía de instalación
Dependiendo de su diagnóstico, elija uno de los siguientes métodos:
A. Reemplazo de la válvula de descarga completa
Cuándo elegir: Base agrietada, fugas constantes o superficies de sellado desgastadas.
Pasos de eliminación:
Pasos de instalación:
B. Reemplazo únicamente del recipiente (cubeta)
Cuándo elegir: El tanque y la base están bien, pero el recipiente tiene fugas, está deformado o es lento.
Pasos de eliminación:
Pasos de instalación:
Esta es una de las formas más sencillas de utilizar el kit de reparación de válvula de descarga y evita la extracción del tanque por completo.
4. Pruebas y ajustes
5. Conclusión
Reemplazar una válvula de descarga puede parecer técnico, pero con las herramientas y la guía adecuadas, es una tarea sencilla. Ya sea que se trate de una válvula Kohler de dos piezas... válvula de descarga del inodoro Reemplazo o simplemente intercambio de los componentes del kit de reparación de la válvula de descarga, la instalación adecuada garantiza la eficiencia del agua y una descarga confiable en todo momento.
Siempre confirme la dimensión y el tipo de válvula de descarga antes de comprarla, ya que los modelos Kohler varían ampliamente entre los diferentes tipos de sistemas de descarga de inodoros.
Nuestro horario
24 horas en línea